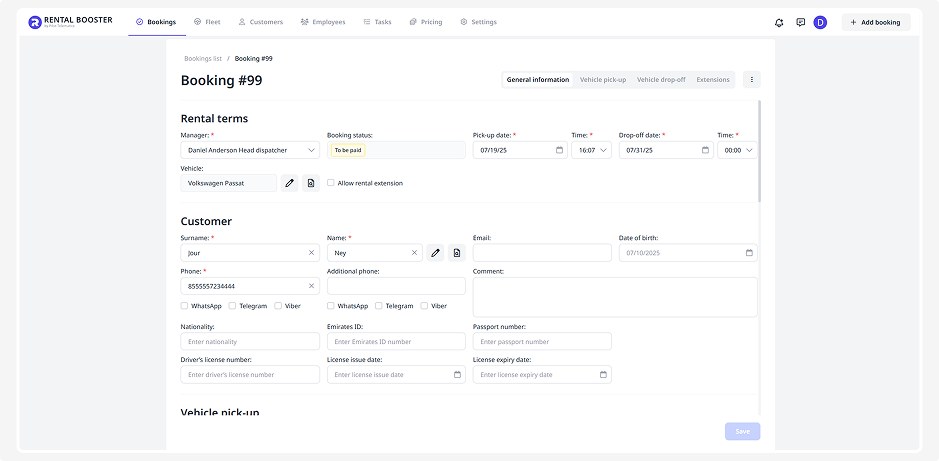
General information
The General information tab contains all the key details about a booking.
Here you can:
— fill in details for a new booking
— update information for an existing one
Information is divided into blocks:
• Customer
• Extras
• Payments
Enter the main booking details:
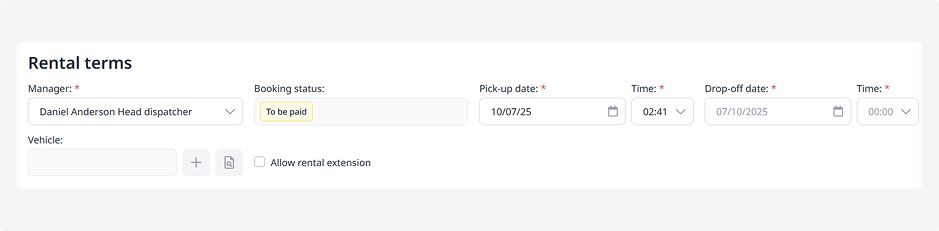
• Responsible manager — select a staff member from the list (set up in the Employees section)
• Booking status — the current stage of the rental
• Rental period — start and end date and time
• Vehicle — click  to select a vehicle from the fleet.
If the booking already exists, you’ll see an edit icon  next to the Vehicle field, allowing you to change the selection.
A view icon  will also appear, which opens the page of the selected vehicle.
-
Document number — a reference number used in the contract and voucher.
-
External booking number — the booking number from an external system or partner. If the booking comes from a marketplace or aggregator, this number is filled in automatically and used for data matching.
• Allow rental extension — tick this box if extending the rental is allowed
The information required in the customer profile depends on the country selected in the Company section.
For most countries, a standard customer profile is used.
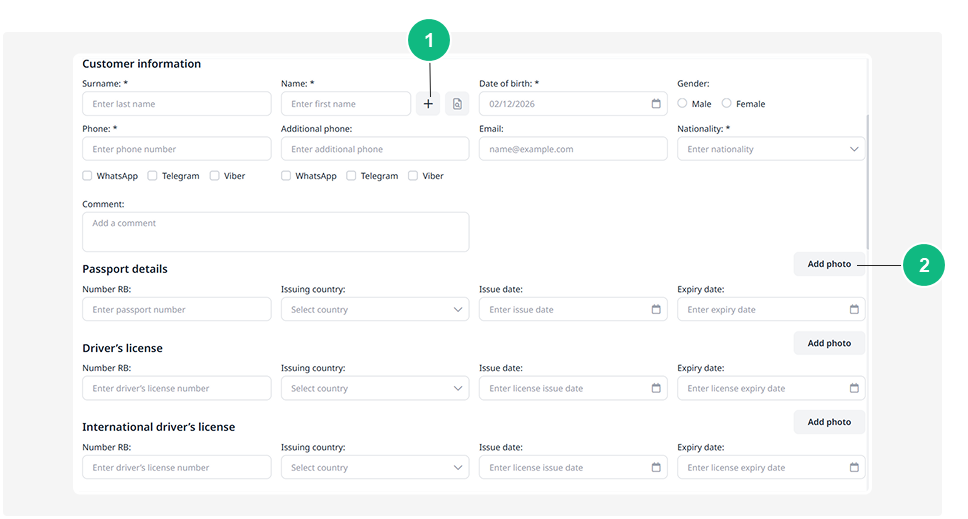
1 — Add customer
2 — Add photo
In this case, fill in the basic information:
— first and last name
— date of birth
— gender
— contact details (phone numbers, messengers)
— email
— nationality
If required, provide passport details and driver’s license information.
If the customer already exists in your database (section Customers), click the select icon 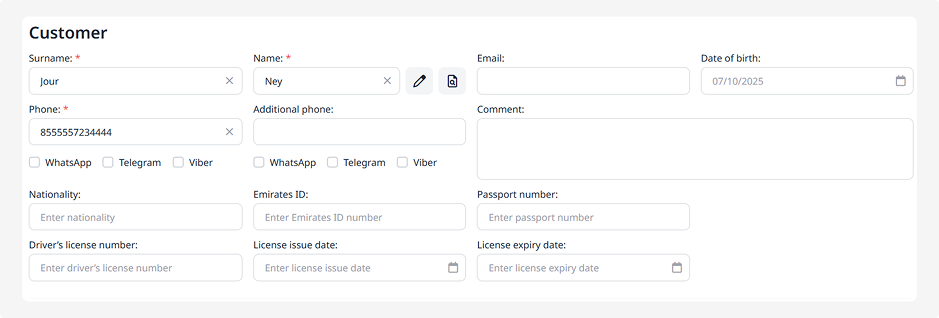 to choose them from the list.
To upload document photos, click Add photo, select the file, and save it.

If the country selected in Company settings is UAE, the system provides three customer types:
-
Tourist
-
Resident
-
GCC National
Before entering the data, select the appropriate customer type. The form will change depending on your selection.
Tourist
For the Tourist type, provide:

-
Basic information: first name, last name, date of birth, gender, contact details (phone numbers, messengers), email, nationality
-
Passport: series and number, issuing country, issue date, expiry date

-
Driver’s license: number, issuing country, issue date, expiry date
-
International driver’s license: number, issuing country, issue date, expiry date
Resident
For a Resident, provide:
-
Basic information: first name, last name, date of birth, gender, contact details (phone numbers, messengers), email, nationality
-
Emirates ID (EID): number and expiry date
-
Passport: series and number, issuing country, issue date, expiry date
-
Driver’s license: number, issuing country, issue date, expiry date
GCC National
For a GCC National, provide:
-
Basic information: first name, last name, date of birth, gender, contact details (phone numbers, messengers), email, nationality
-
National ID: number, issuing country, issue date, expiry date
-
Driver’s license: number, issuing country, issue date, expiry date
Specify details about where, when, and how the vehicle will be handed over to the customer:
• Location — select a pick-up point from those created in the Delivery tab
• Delivery cost — enter an extra fee if delivery occurs outside the company office
• Arrival flight — if the customer arrives by plane, specify the flight number and time
• Address — enter the exact location where the customer will collect the vehicle (for example: Domodedovo Airport, Terminal D, Parking Area 3)
• Comment — any additional details useful during the pick-up process
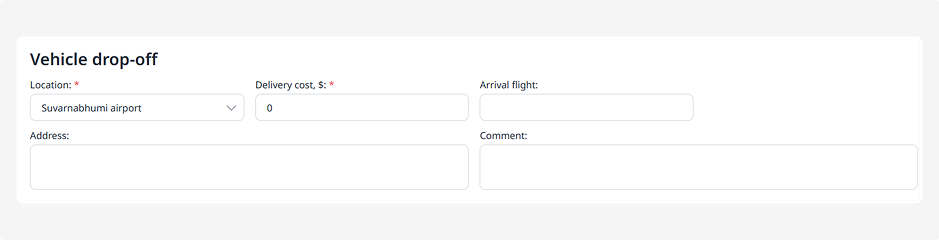
Specify where and how the customer should return the vehicle after the rental:
• Location — select a drop-off point
• Delivery cost — if return occurs outside the office, specify the return delivery fee
• Departure flight — if the return is at the airport, specify the flight number and departure time
• Drop-off address — the specific address where the vehicle will be returned
• Comment — any additional notes
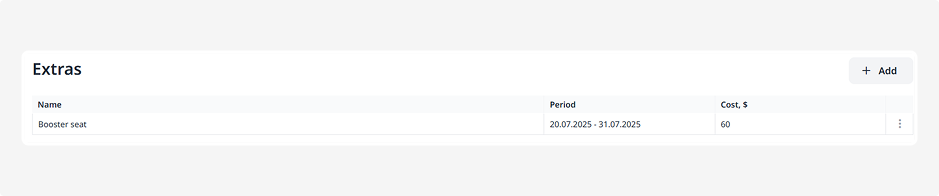
Add additional services to the booking — for example, a child seat, Wi-Fi router, or insurance:
1. Click Add
2. In the pop-up window, select the desired service from the list
3. Specify the price and service dates
4. Click Save
After saving, the extra service will appear in the list and be included in the booking’s final cost calculation.
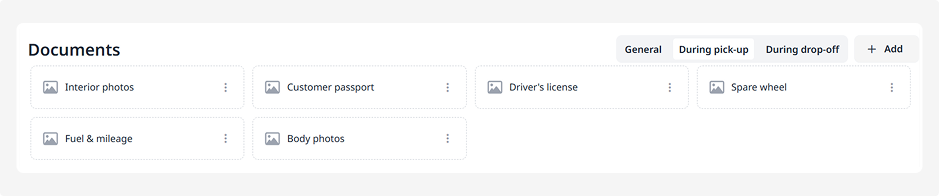
Here you can attach all required documents related to the booking.
Documents are grouped by rental stages:
• General — for example, the agreement, passport copies, authorization letters, and other files valid for the entire rental period
• Pick-up — for example, handover reports and vehicle condition photos
• Drop-off — return reports, photos of damages, and other closing documents
How to add a document:
1. Click Add
2. Enter the document name
3. Upload the file from your device
4. Click Save
You can attach multiple documents for each stage. All uploaded files will be available for viewing on the booking page.
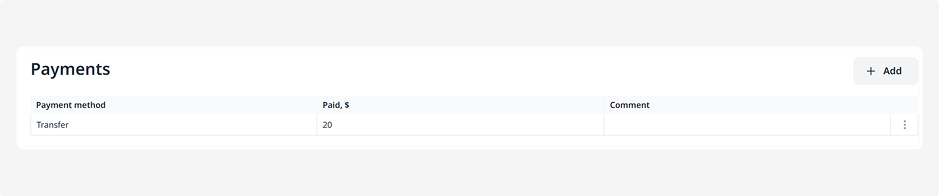
Here you can add all payments related to the booking.
How to add a payment:
1. Click Add
2. Select the payment method: card, cash, or transfer
3. Enter the payment amount
4. Add a comment if necessary
5. Click Save
The payment will appear in the overall calculation.
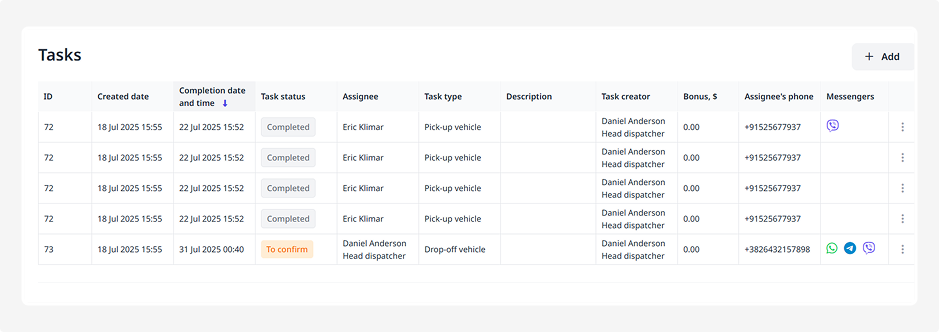
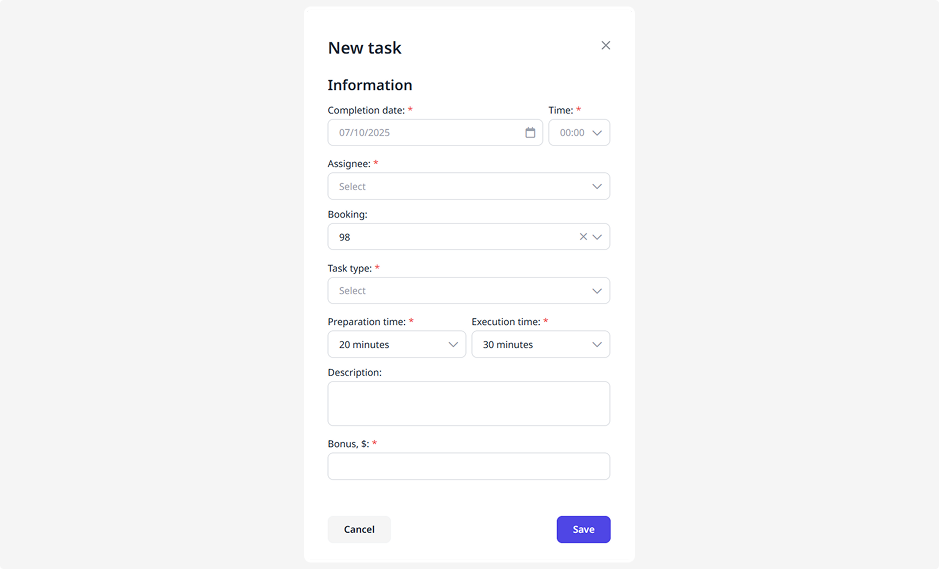
For saved and confirmed bookings, a Tasks block becomes available. It automatically includes pick-up and drop-off tasks, but you can also add a task manually.

How to add a task manually:
1. Click Add
2. Fill in the following details:
• Completion date and time
• Assignee — select from the list
• Booking related to the task
• Task type
• Preparation and execution time
• Reward for the executor
3. Click Save
The task will appear in the list and link to the booking.
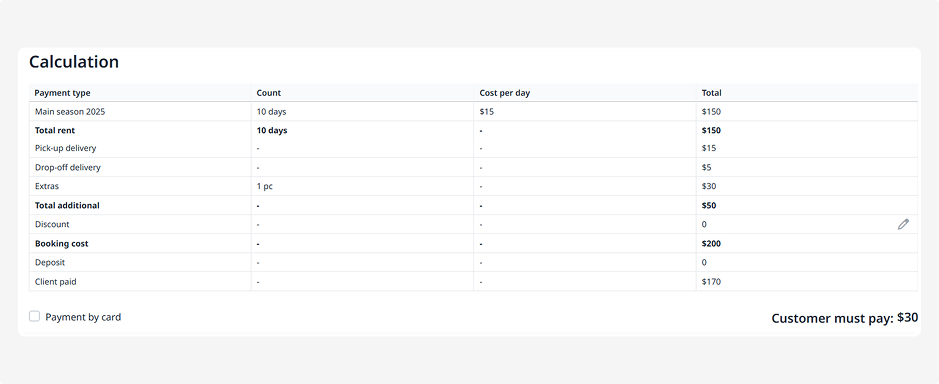
This block displays all cost details:
• Payment types (for example: rental, extras, delivery)
• Number of days or units
• Price per day or unit
• Total for each type
At the bottom of the table, you’ll see the total amount including prepayments, discounts, and surcharges.
Tick Payment by card if this payment method is used for the booking.
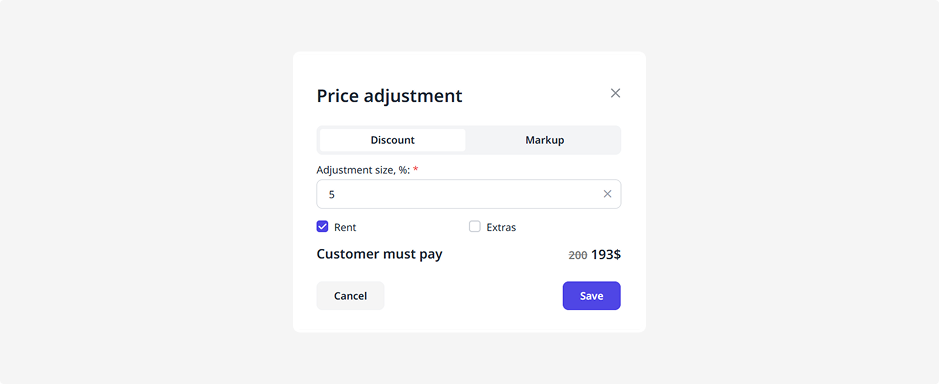
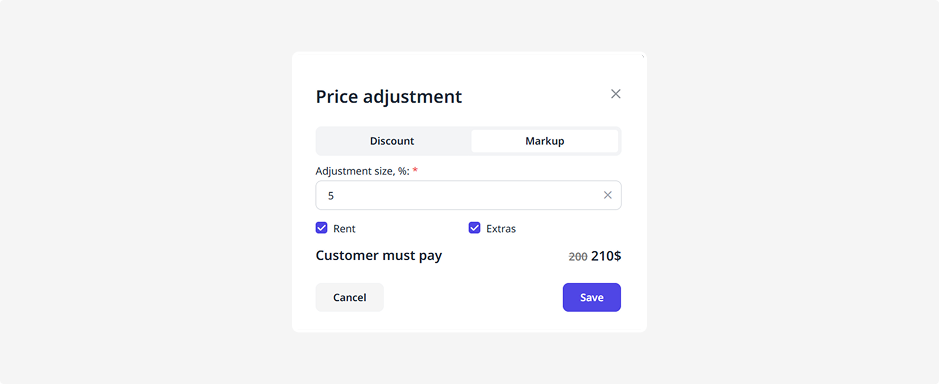
How to add a discount
1. In the Discount row, click 
2. In the Price adjustment window, enter the discount percentage
3. Select whether it applies to rental or extras
4. Click Save
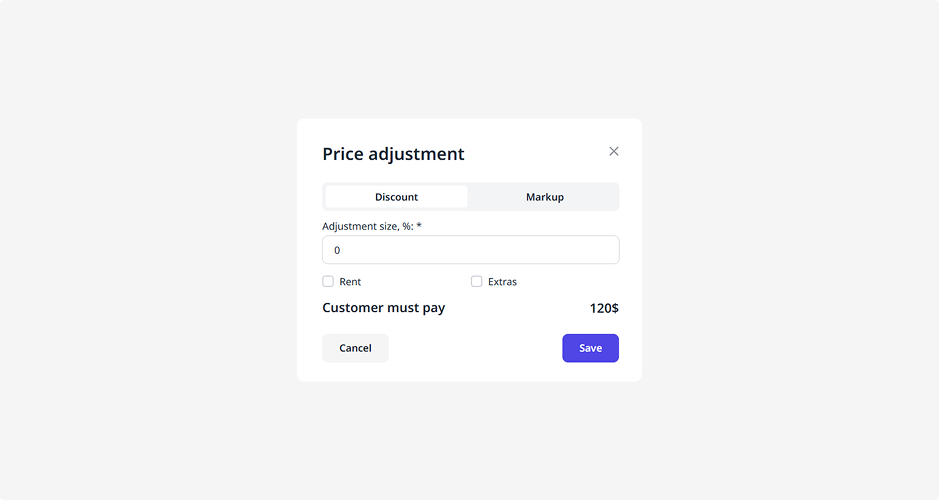
How to add a surcharge
1. In the Price adjustment window, open the Markup tab
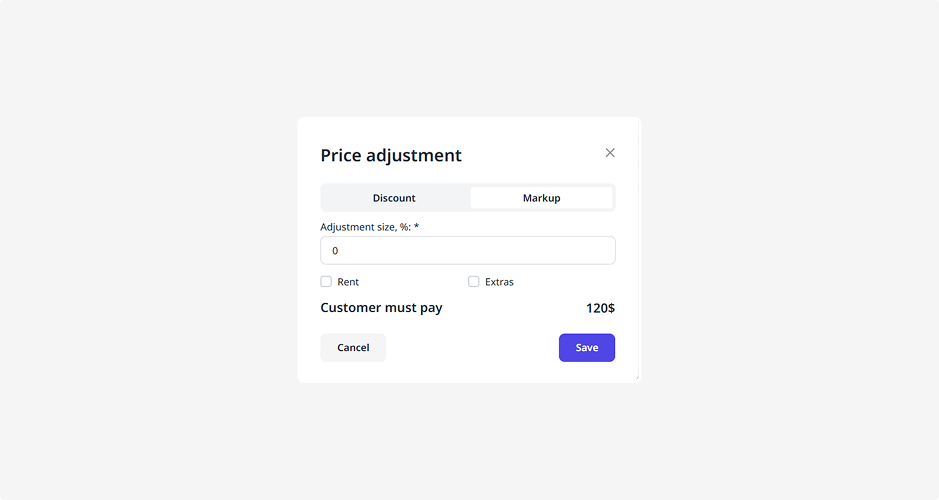
2. Enter the markup percentage
3. Specify what it applies to
4. Click Save
Discounts and surcharges are displayed in the general calculation table.
Saving general information
After completing all fields, click Save to create or update the booking page.