How to connect Chat
To connect Chat, you will need:
-
a SendPulse account
-
a SendPulse plan that supports chatbots
-
a SendPulse API token
If you do not have a SendPulse account
1. Create a SendPulse account
2. Confirm your contact details
3. Select and purchase a plan that supports chatbots
4. Once the plan is active, create an API token
Registration requirements, available payment methods, and plan features are determined by SendPulse and may change. If you have any difficulties with registration or payment, please contact SendPulse Support.
Choose a plan based on the number of subscribers you expect to have. For example, a plan for up to 500 subscribers may be suitable if it meets your company’s needs.
To create an API token:
1. Sign in to SendPulse
2. Open your account settings

3. Go to the API section
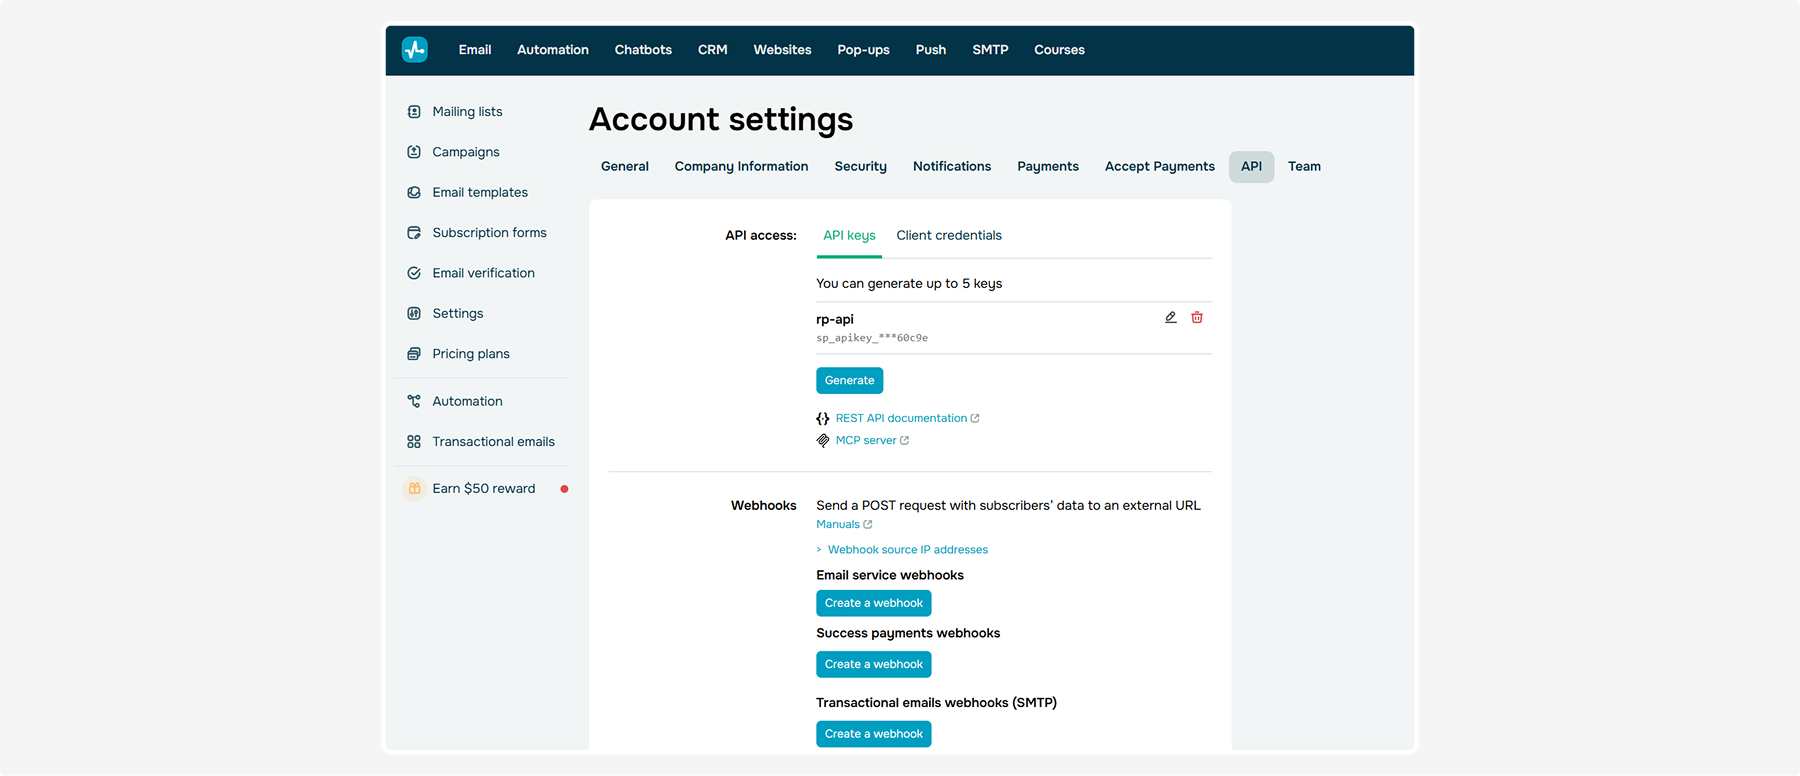
4. Create a new API token
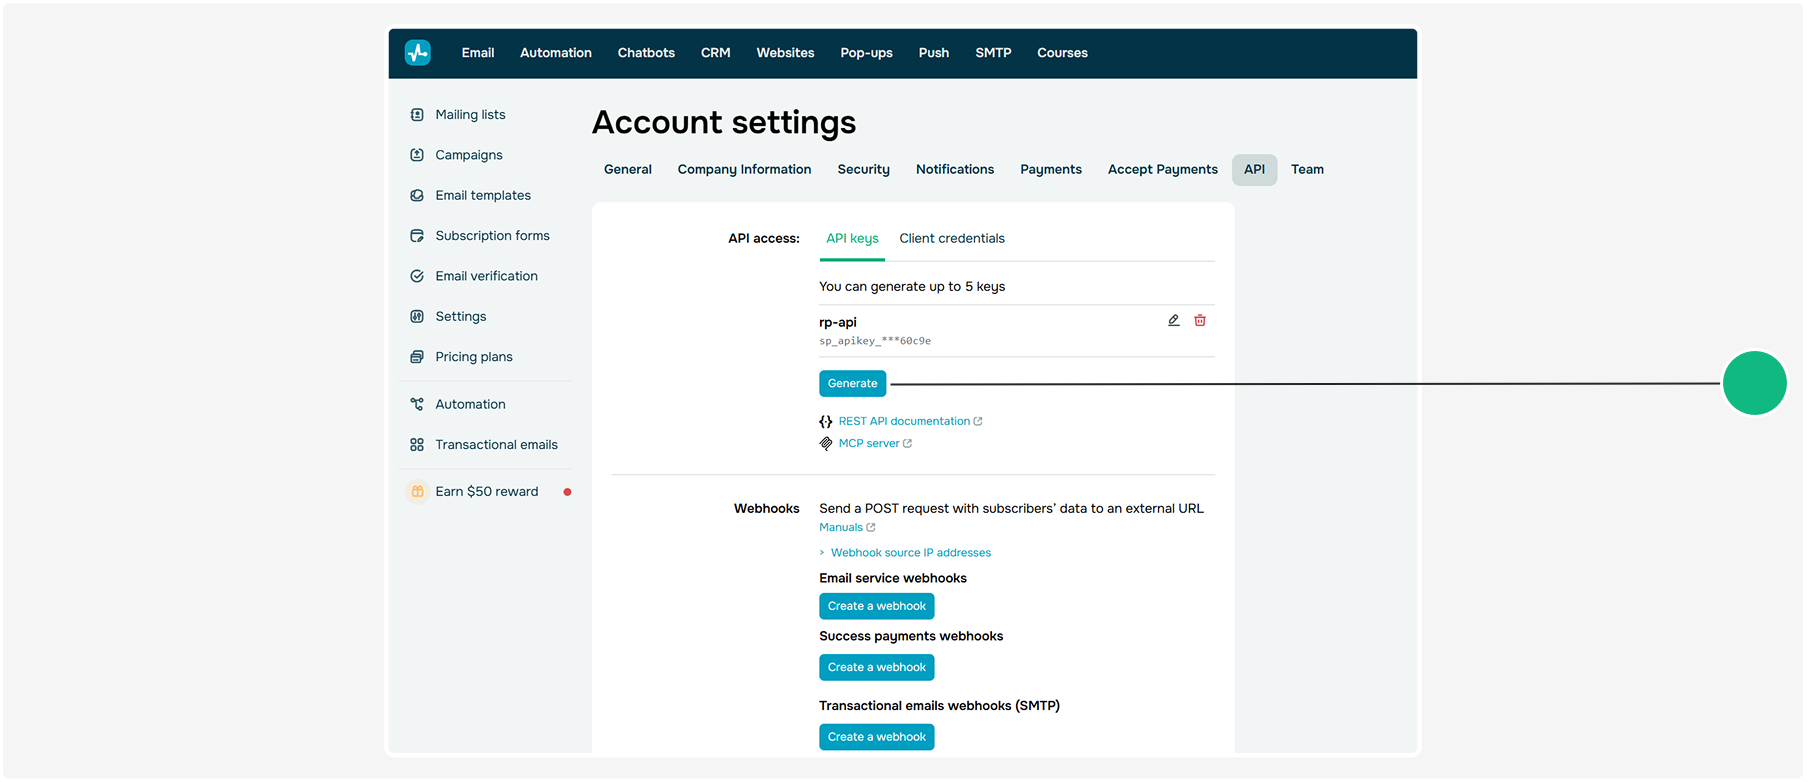
5. Copy and save the token
You will need this token to connect SendPulse to Rental Booster.
How to connect the Chat integration
Before connecting Chat for the first time, please contact Rental Booster support. Our team will prepare the integration for your account and complete the required internal setup.
|
1. Contact Rental Booster Support and ask us to prepare the Chat integration
2. Wait for confirmation that the required setup is complete
3. In Rental Booster, open the Integrations section
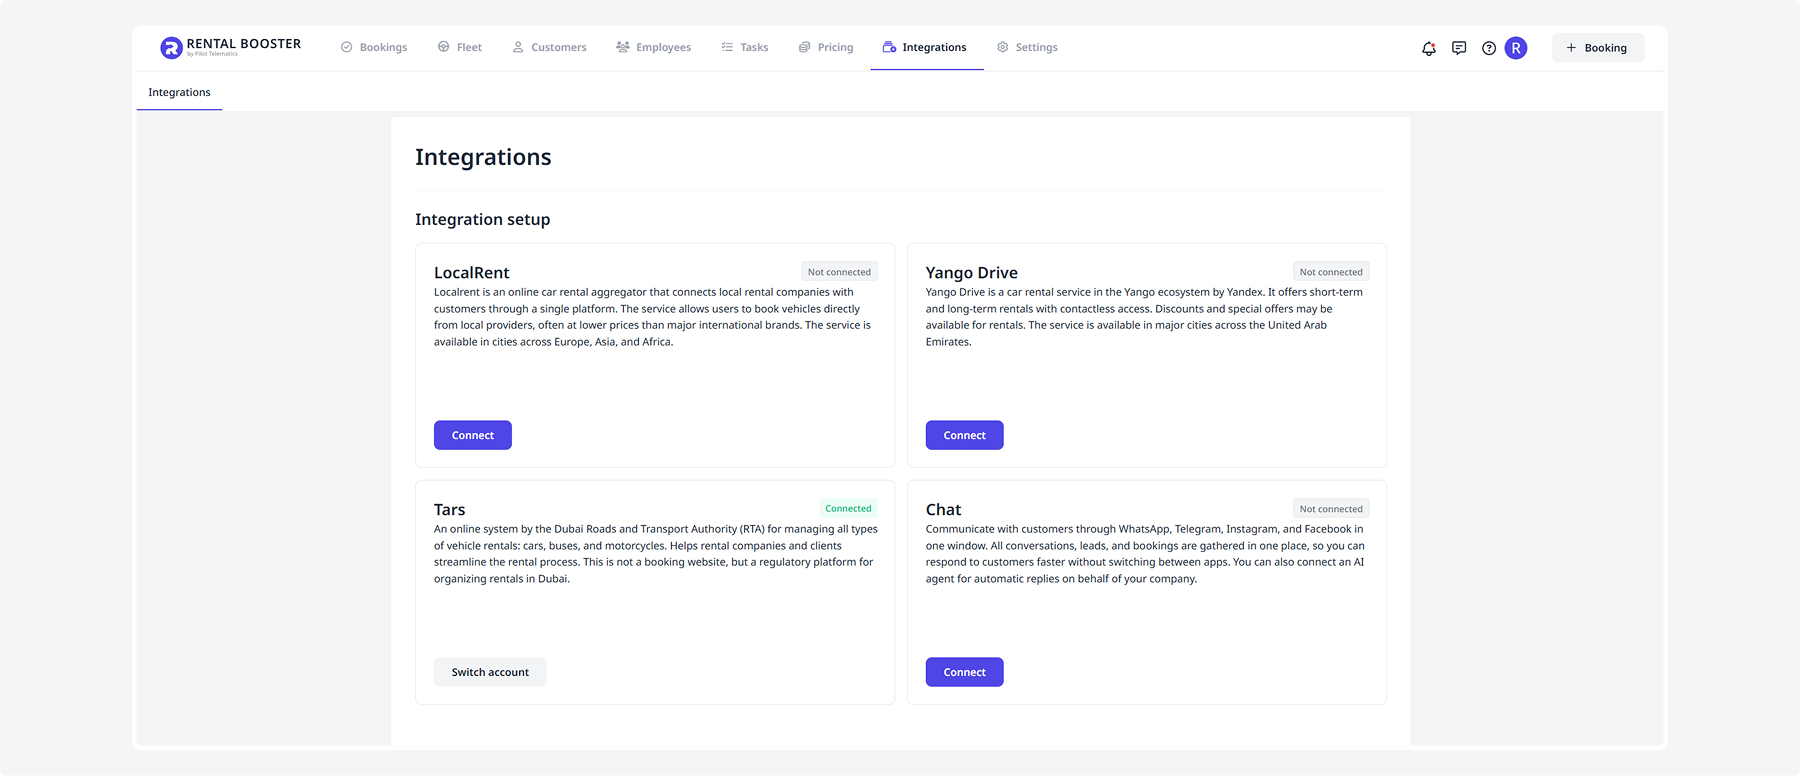
4. Find the Chat card and click Connect
5. Enter your SendPulse API token

6. Click Connect again
Once the integration has been connected successfully, its status will change to Connected.

You can now add the required communication channels and chatbots in SendPulse.
Once the Chat integration is connected, you can add one or more chatbots.
1. Sign in to SendPulse
2. Open the Chatbots section

3. Go to Manage bots
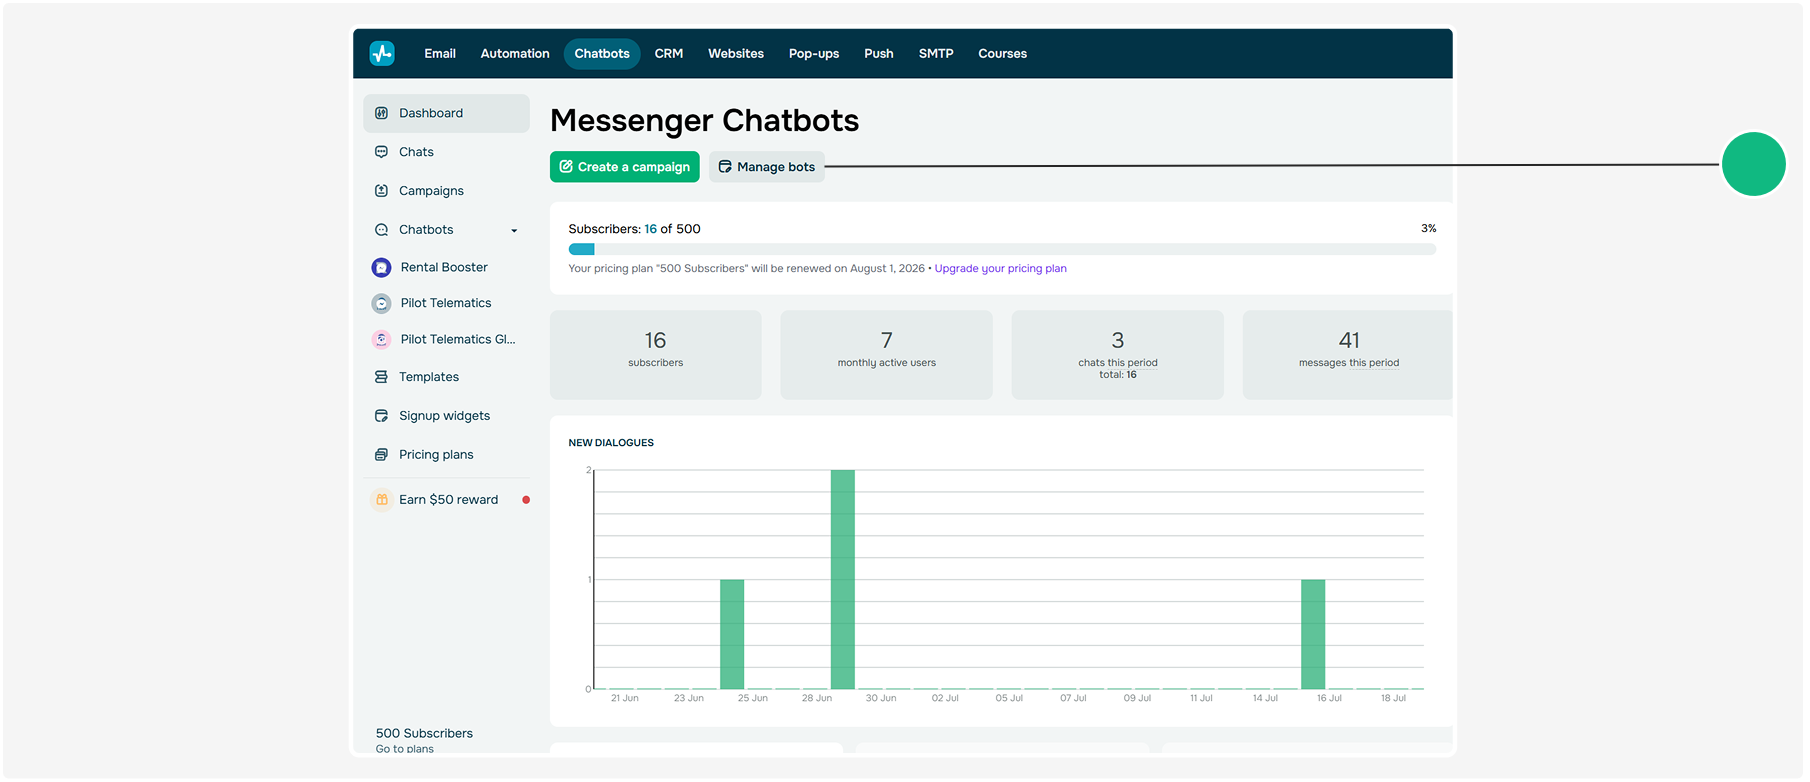
4. Click Connect next to the required channel

5. Follow the SendPulse instructions for the selected channel
6. Once the bot is connected, open Bot Settings

7. Go to the Webhooks section

8. Enable webhooks

9. Enter the Rental Booster webhook URL
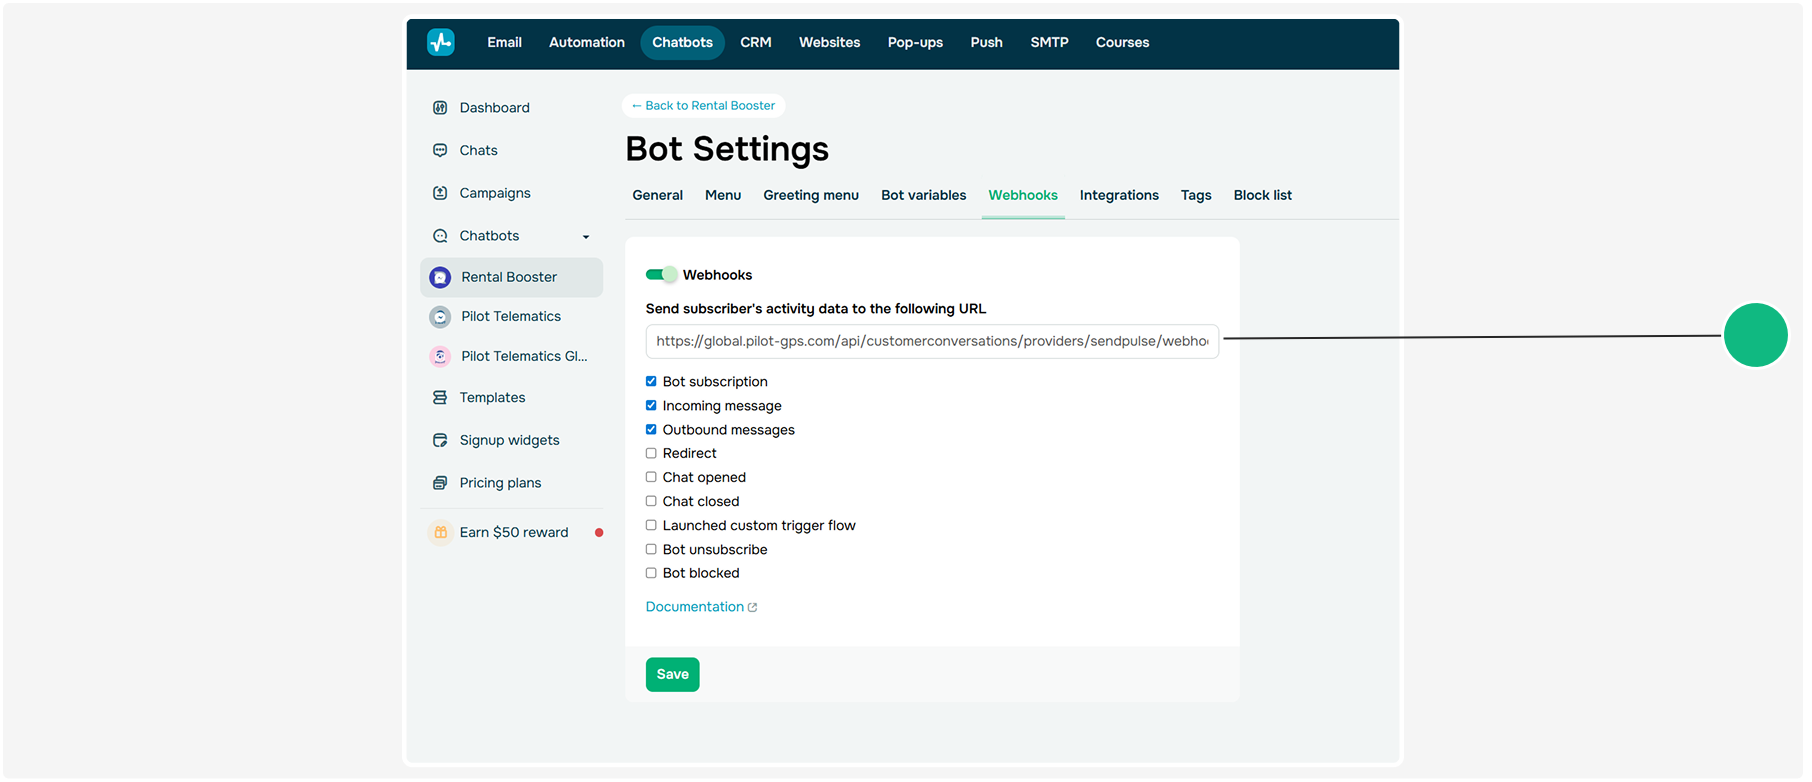
The webhook URL links the selected bot to your Rental Booster account. It allows messages and notifications from the connected channel to appear in your company’s Chat.
To get the correct webhook URL, contact Rental Booster Support. Our team will provide the URL associated with your account and server.
|
10. Select the following webhook events:
-
Bot subscription
-
Incoming message
-
Outgoing message11. Save the settings
The bot is now ready to use. New messages from the connected channel will begin appearing in Rental Booster Chat.
To add another bot, repeat these steps for the required channel.
How to change the connected account
To connect a different SendPulse account or a different set of channels:
1. Create or copy the API token for the new SendPulse account
2. Open the Integrations section in Rental Booster
3. On the Chat card, click Switch account
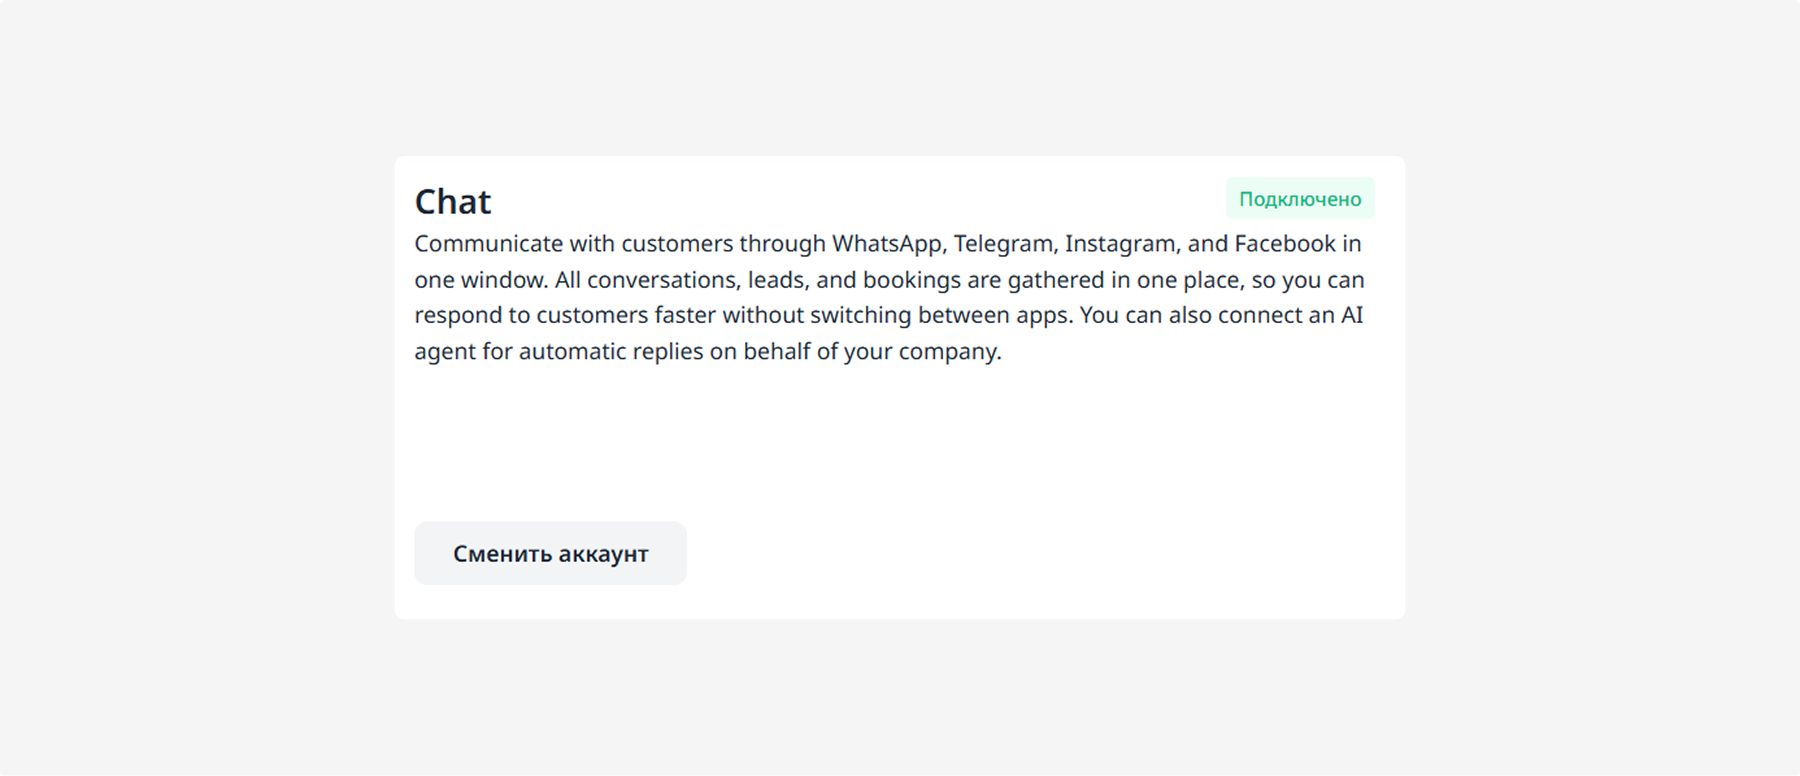
4. Enter the new SendPulse API token and confirm the connection

After switching accounts, configure the required chatbots and webhooks in the new SendPulse account. Messages from these channels will then begin appearing in Rental Booster Chat.
How to disconnect Chat
1. Open the Integrations section
2. Go to the Chat tab
3. Click Disconnect

Once the integration is disconnected, new messages will no longer be received through it.